mediapipe human detection 기능 만들기

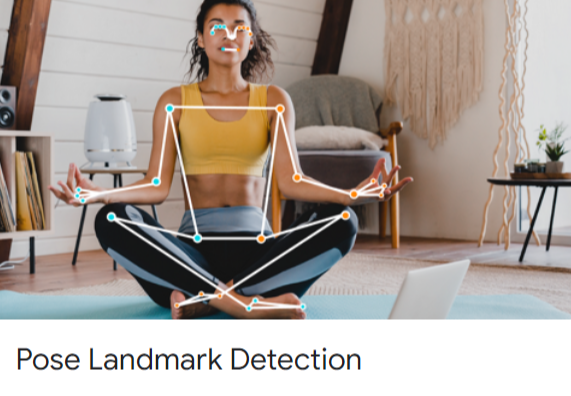
미디어파이프의 Pose Landmark Detection 기능을 이용하여 human detection 기능과 human detection된 image를 crop하여 저장하는 기능까지 만들어보려 한다.
mediapipe의 pose landmarks를 이용해서 사람 얼굴을 detector로 인식한 pose estimation을 이용해서 신체 관절 33개 에 대한 x,y,z 좌표값을 추출해 낼 수 있다. 해당 신체 관절 x,y 값을 이용해서 사람이 포함된 이미지 범위를 찾고 human detection 기능으로도 이용해보고자 한다.
human detection 후 해당 이미지를 crop하여 따로 사진을 저장함으로서, mediapipe를 이용한 human detection 기능도 구현해보았다.
human detector
# Process all images in the folder
count = 0
input_folder = '/home/juno/crawling/raw_image'
for filename in os.listdir(input_folder):
    if filename.endswith('.jpg') or filename.endswith('.png'):
        input_path = os.path.join(input_folder, filename)
        process_image(input_path, filename)
human detection 기능을 수행할 폴더와 image 파일의 경로를 가져온다.
# Human Detection Funtion
def process_image(input_path, filename):

    # 전역변수 불러오기
    global count

    # image 파일 읽어오기
    image = cv2.imread(input_path)

    # pose estimation 기능 설정
    with mp_pose.Pose(min_detection_confidence=0.5, min_tracking_confidence=0.5) as pose:
        image_rgb = cv2.cvtColor(image, cv2.COLOR_BGR2RGB)

        # Process the image and get the pose results
        results = pose.process(image_rgb)
Human Detection 이후 crop된 이미지마다 붙여줄 count 전역변수를 불러온다.
parameter로 input_path를 불러와 cv2.read()함수를 이용해 이미지를 읽어준다.
읽어온 이미지에서 사람의 Pose Landmarks를 찾아줄 mediapipe pose estimation 기능을 설정한다.
results로 이미지에 있는 사람의 관절 위치를 추정한다.
        if results.pose_landmarks:
            # Extract specific landmarks (e.g., landmarks 33)
            landmarks_33 = results.pose_landmarks.landmark[:33]

            # Get x, y coordinates of each landmark
            x_values = [landmark.x for landmark in landmarks_33]
            y_values = [landmark.y for landmark in landmarks_33]

            # Calculate the bounding box coordinates
            x_min = int(min(x_values) * image.shape[1])
            y_min = int(min(y_values) * image.shape[0])
            x_max = int(max(x_values) * image.shape[1])
            y_max = int(max(y_values) * image.shape[0])

            # Expand the bounding box by 30% (1.2 times)
            x_min = int(x_min * 0.7)
            y_min = int(y_min * 0.7)
            x_max = int(x_max * 1.3)
            y_max = int(y_max * 1.3)

            # Crop the detected person's region
            cropped_person = image[y_min:y_max, x_min:x_max]

            if cropped_person.size == 0:
                return False
모든 33개의 관절 Landmarks xyz 좌표값을 이용해서 human detection과 crop image 기능을 수행한다.
사람의 자세에 따라 x,y 값이 변동되기 때문에 두 어깨선의 차이 혹은 머리부터 발끝까지로 X,Y 최대 값을 구할 순 없었다.
그래서 모든 33개의 좌표값의 XY 값을 구한뒤 X좌표와 Y좌표의 최대값 최소값을 구한 차이값을 구한다.
X좌표 Y좌표의 차이 최댓값을 이용해도 사람의 모든 신체 부위를 CROP하는 BOUNDING BOX를 만들긴 어렵다.
BLAZE POSE로 뽑아낸 Skeleton data자체가 사람 신체 내부쪽에 위치하기 때문이다.
X좌표, Y좌표 차이 최댓값에 1.3배 ~ 2배까지 곱해 원하는만큼 Bounding Box를 구한 뒤, 크롭하여 저장한다.
mediapipe human detection & crop image classifier의 장점
1. 사람과 그림(일러스트, 그림)을 구분한다.
기본적으로 사람 얼굴을 detect한 뒤, human pose estimation을 수행하기 때문에, 기본적인 그림/일러트스와 같은 사람이 아닌 사진은 bad 폴더를 만들어 구분할 수 있다.
실제로 해당 기능을 이용해, 육안으로 그림을 구분하는 시간을 대폭 줄여 데이터 정제 시간을 줄일 수 있었다.
다만 너무 정교한 일러스트와 그림은 구분하기 힘들기 때문에, 한번의 검수는 꼭 필요하다.
2. 원하는 이미지 데이터셋을 만들 수 있다.
mediapipe pose estimation 이후 landmarks point를 이용한 사람 몸 전체를 detection했다.
하지만 원한다면 허리, 어깨, 무릎이상 등 Landmarks X, Y 좌표값을 이용해서 원하는 화각 Crop된 image dataset을 얻을 수 있다.
mediapipe human detection 전체 코드
import cv2
import mediapipe as mp
import os

# Create output folders
output_good_folder = '/home/juno/crawling/good_image'
output_bad_folder = '/home/juno/crawling/bad_image'
mp_pose = mp.solutions.pose

count= 0

# Function to perform pose estimation and crop image
def process_image(input_path, filename):
    global count
    image = cv2.imread(input_path)
    with mp_pose.Pose(min_detection_confidence=0.5, min_tracking_confidence=0.5) as pose:
        # Convert the BGR image to RGB
        image_rgb = cv2.cvtColor(image, cv2.COLOR_BGR2RGB)

        # Process the image and get the pose results
        results = pose.process(image_rgb)

        if results.pose_landmarks:
            # Extract specific landmarks (e.g., landmarks 33)
            landmarks_33 = results.pose_landmarks.landmark[:33]

            # Get x, y coordinates of each landmark
            x_values = [landmark.x for landmark in landmarks_33]
            y_values = [landmark.y for landmark in landmarks_33]

            # Calculate the bounding box coordinates
            x_min = int(min(x_values) * image.shape[1])
            y_min = int(min(y_values) * image.shape[0])
            x_max = int(max(x_values) * image.shape[1])
            y_max = int(max(y_values) * image.shape[0])

            # Expand the bounding box by 30% (1.2 times)
            x_min = int(x_min * 0.7)
            y_min = int(y_min * 0.7)
            x_max = int(x_max * 1.3)
            y_max = int(y_max * 1.3)

            # Crop the detected person's region
            cropped_person = image[y_min:y_max, x_min:x_max]

            if cropped_person.size == 0:
                return False

            # Save the cropped image to the appropriate folder
            output_path = output_good_folder if cropped_person.size != 0 else output_bad_folder
            count += 1
            output_path += f'/{filename[:-4]}_{count}.jpg'
            cv2.imwrite(output_path, cropped_person)
            print(f"Person detected in {input_path}. Moved to 'good' folder.")

            return True

        # If no person is detected, move the original image to the 'bad' folder
        output_path = output_bad_folder
        count += 1
        output_path += f'/{filename[:-4]}_{count}.jpg'
        cv2.imwrite(output_path, image)
        print(f"No person detected in {input_path}. Moved to 'bad' folder.")

        return False

# Process all images in the folder
input_folder = '/home/juno/crawling/raw_image'
for filename in os.listdir(input_folder):
    if filename.endswith('.jpg') or filename.endswith('.png'):
        input_path = os.path.join(input_folder, filename)
process_image(input_path, filename)'머신러닝딥러닝 > detection' 카테고리의 다른 글
| human pose recoginition vanila lstm model vs 가변 길이 lstm model (0) | 2023.03.10 |
|---|---|
| mediapipe pose estimation data : pose_landmarks VS pose_world_landmarks (0) | 2023.02.23 |
| Mediapipe pose estimation BrazePose 33 landmarks 정보 추출하기 (1) | 2023.02.09 |
| mediapipe - face detect & pose estimation 동시 실행하기 (0) | 2023.01.20 |
| mediapipe face detect - webcam 실시간 실행하기 (0) | 2023.01.19 |


댓글