Mediapipe
Face detect & Pose estimation
웹캠 실시간 동시 실행하기
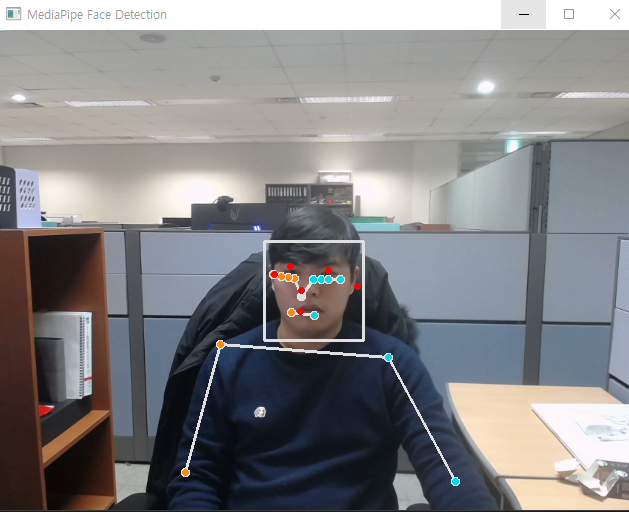
face detection + pose estimation
1. 필요한 라이브러리 설정하기
import cv2
import mediapipe as mp
mediapipe와 opencv 라이브러리를 가져와 import 한다.
2. mediapipe solution 중 필요한 것들 가져오기
# face detect에서 필요한 solutions
mp_face_detection = mp.solutions.face_detection
mp_drawing = mp.solutions.drawing_utils

# pose estimation에서 필요한 solutions
# mp_drawing = mp.solutions.drawing_utils # face detect와 중복변수이므로 제거
mp_drawing_styles = mp.solutions.drawing_styles
mp_pose = mp.solutions.pose
3. 웹캠 인식+ with문으로 필요한 solution 설정하기
# For webcam input:
cap = cv2.VideoCapture(0)
with mp_face_detection.FaceDetection(
    model_selection=0, min_detection_confidence=0.5) as face_detection,\
    mp_pose.Pose(
      min_detection_confidence = 0.5,
      min_tracking_confidence = 0.5) as pose:
  while cap.isOpened():
    success, image = cap.read()
    if not success:
      print("Ignoring empty camera frame.")
      # If loading a video, use 'break' instead of 'continue'.
      continue
cv2.VideoCapture(0)로 0번 port에 인식되어 있는 webcam에서 영상을 가져온다.
with 구문
with구문은 클래스의 객체를 만들고 이용한 뒤, 생성한 객체를 소멸시킬 수 있는 구문이다.
객체의 lifecycle(생성 → 사용 → 소멸)을 설계할 수 있다.
with mp_face_detection.FaceDetection(
    model_selection=0, min_detection_confidence=0.5) as face_detection,\
    mp_pose.Pose(
      min_detection_confidence = 0.5,
      min_tracking_confidence = 0.5) as pose:
with 구문으로 mediapipe의 solution인 my_face_detection.FaceDetection과 my_pose.Pose 2개를 불러와 클래스 객체를 생성한다.
  while cap.isOpened():
    success, image = cap.read()
    if not success:
      print("Ignoring empty camera frame.")
      # If loading a video, use 'break' instead of 'continue'.
      continue
cap.isOpened() : webcam을 오픈하고
cap.read()로 webcam에 저장되고 있는 image 파일을 가져온다.
webcam open에 실패했다면 비어있는 camera frame은 무시한다는 알림이 간다.
실시간 이미지에 face detect + pose estimation 정보 계산하기
    # To improve performance, optionally mark the image as not writeable to
    # pass by reference.
    image.flags.writeable = False
    image = cv2.cvtColor(image, cv2.COLOR_BGR2RGB)
    # result1 = image에서 얼굴을 인식한 bbox + point 계산
    # result2 = 사람 객체에서 관절의 skeleton을 추출함
    result1 = face_detection.process(image)
    result2 = pose.process(image)
cv2.cvtColor(image, cv2.COLOR_BGR2RGB)를 수행하게 되면 얼굴과 옷 부분의 색상이 RGB의 반대로 변하게 된다.
그리고 해당 이미지를 face detect는 result 1에 넣어주고, pose estimation은 result2 변수에 넣어준다.
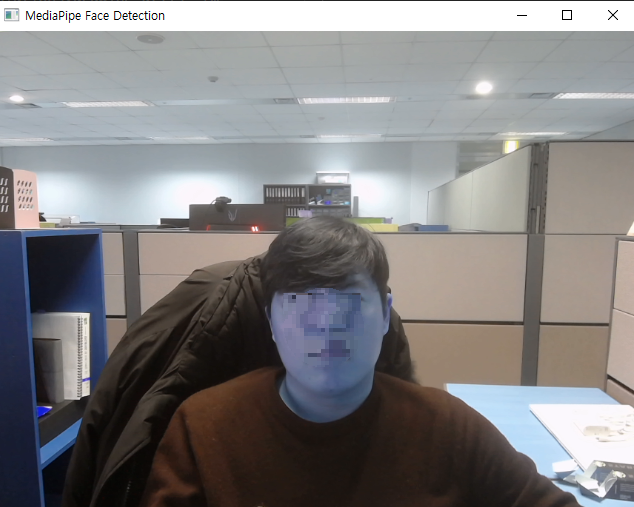
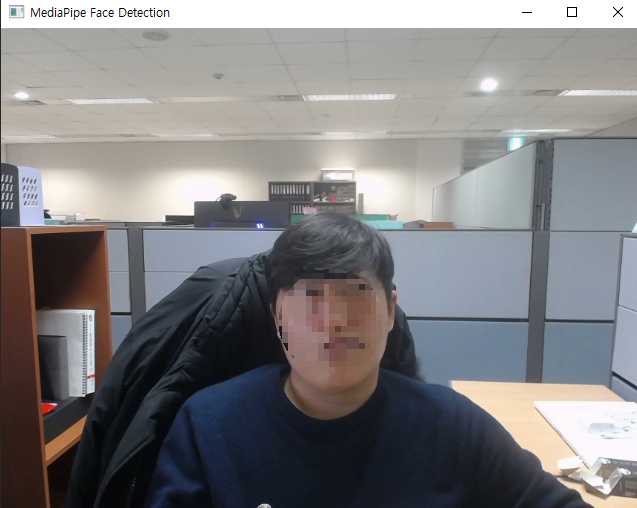
이미지를 다시 cv2.cvtColor(image, cv2.COLOR_RGB2BGR)에 넣어주면 변환되었던 색이 다시 일반적인 색상으로 돌아온다.
실시간 이미지에 face detect + pose estimation 정보를 그려 넣기
    mp_drawing.draw_landmarks(
        image,
        result2.pose_landmarks,
        mp_pose.POSE_CONNECTIONS,
        landmark_drawing_spec=mp_drawing_styles.get_default_pose_landmarks_style())
먼저 pose estimation의 좌표를 구했으니 image에 먼저 pose의 skeleton을 구해줍니다.
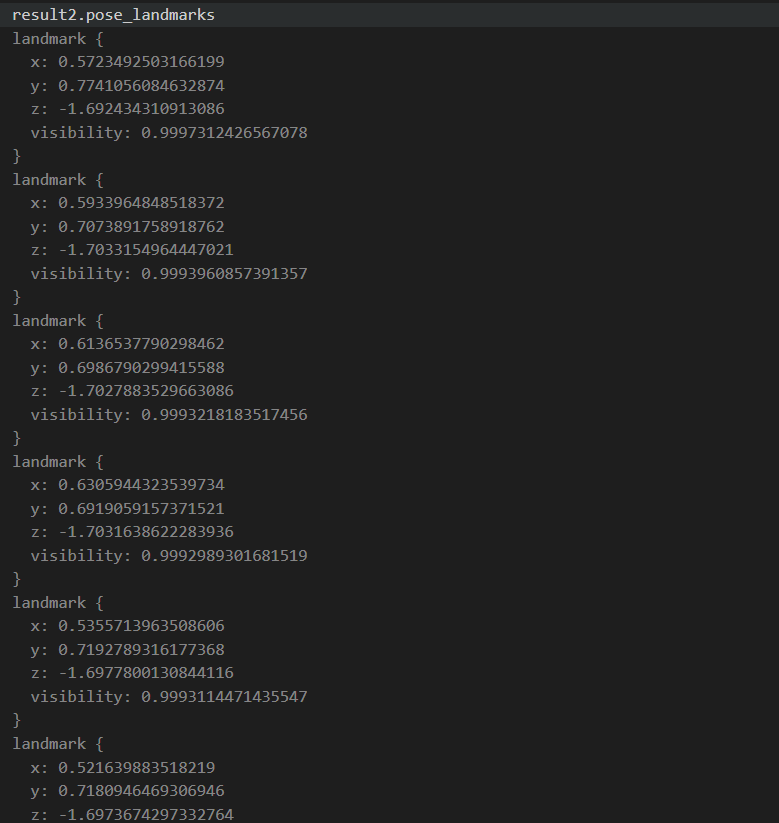
skeleton 정보의 기반이 되는 pose_landmarks의 좌표 정보를 3차원으로 가져올 수 있다.
    # detection 내부에 bbox 좌표와 point 들의 좌표값이 x,y, score로 설정되어 있음
    if result1.detections:
      for detection in result1.detections:
        mp_drawing.draw_detection(image, detection)
다음으로 pose estimation이 그려진 image 위에 face_detection 정보를 그려줍니다.
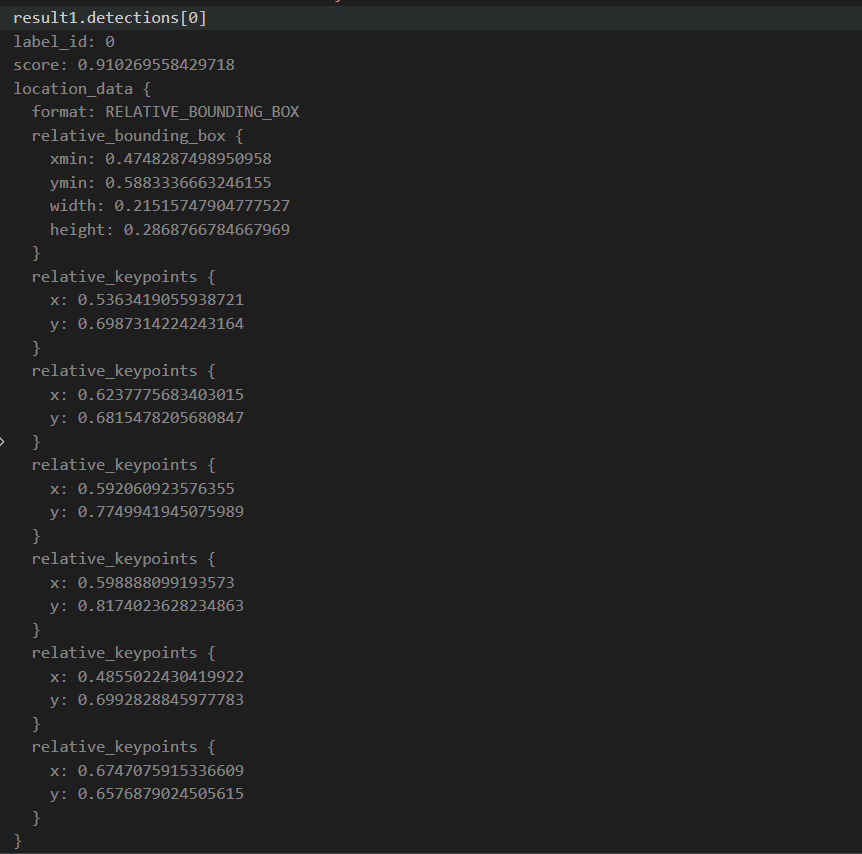
face_detection 정보에 bounding_box 정보와 6개 keypoint의 좌표 정보(x, y)가 들어가 있는 걸 알 수 있다.
1 frame에 1개 image 2개의 pose estimation & face_detect가 그려져 동시에 pose와 face를 detect 할 수 있게 됩니다.
실시간 웹캠에서 detect + estimation 되는 부분을 영상으로 확인하기
    # Flip the image horizontally for a selfie-view display.
    cv2.imshow('MediaPipe Face Detection', cv2.flip(image, 1))
    if cv2.waitKey(5) & 0xFF == 27:
      break
cap.release()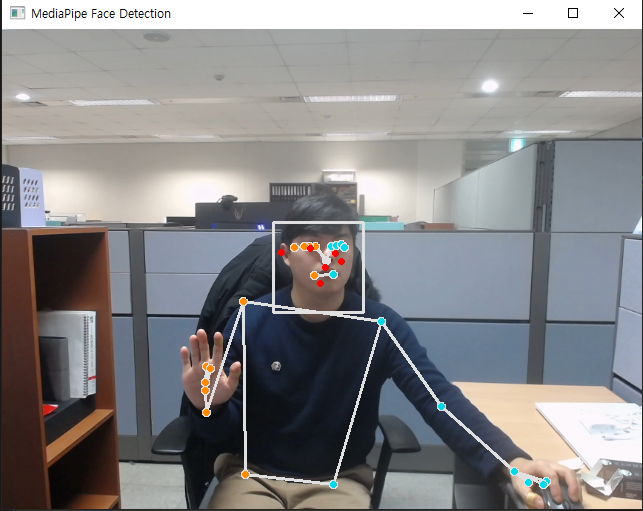
실제 영상으로 확인해 보면 자세에 따른 pose estimation으로 skeleton이 만들어지고, 몸의 움직임에 따라서 바뀌는 걸 확인할 수 있다.
또한 동시에 얼굴에도 bbox와 6개의 얼굴 포인터들이 나타나면서 face detect도 동시에 됨을 확인할 수 있다.
전체 코드
import cv2
import mediapipe as mp
mp_face_detection = mp.solutions.face_detection
mp_drawing_styles = mp.solutions.drawing_styles
mp_drawing = mp.solutions.drawing_utils
mp_pose = mp.solutions.pose

# For webcam input:
cap = cv2.VideoCapture(0)
with mp_face_detection.FaceDetection(
    model_selection=0, min_detection_confidence=0.5) as face_detection,\
    mp_pose.Pose(
      min_detection_confidence = 0.5,
      min_tracking_confidence = 0.5) as pose:
  while cap.isOpened():
    success, image = cap.read()
    if not success:
      print("Ignoring empty camera frame.")
      # If loading a video, use 'break' instead of 'continue'.
      continue

    # To improve performance, optionally mark the image as not writeable to
    # pass by reference.
    image.flags.writeable = False
    image = cv2.cvtColor(image, cv2.COLOR_BGR2RGB)
    # result = image에서 얼굴을 인식한 bbox + point 계산
    result1 = face_detection.process(image)
    result2 = pose.process(image)

    # Draw the face detection annotations on the image.
    image.flags.writeable = True
    image = cv2.cvtColor(image, cv2.COLOR_RGB2BGR)


    mp_drawing.draw_landmarks(
        image,
        result2.pose_landmarks,
        mp_pose.POSE_CONNECTIONS,
        landmark_drawing_spec=mp_drawing_styles.get_default_pose_landmarks_style())

    # detection 내부에 bbox 좌표와 point 들의 좌표값이 x,y, score로 설정되어 있음
    if result1.detections:
      for detection in result1.detections:
        mp_drawing.draw_detection(image, detection)

    # Flip the image horizontally for a selfie-view display.
    cv2.imshow('MediaPipe Face Detection', cv2.flip(image, 1))
    if cv2.waitKey(5) & 0xFF == 27:
      break
cap.release()
'머신러닝딥러닝 > detection' 카테고리의 다른 글
| mediapipe pose estimation data : pose_landmarks VS pose_world_landmarks (0) | 2023.02.23 |
|---|---|
| Mediapipe pose estimation BrazePose 33 landmarks 정보 추출하기 (1) | 2023.02.09 |
| mediapipe face detect - webcam 실시간 실행하기 (0) | 2023.01.19 |
| mediapipe pose classification model - webcam streaming environment (0) | 2023.01.18 |
| ubuntu 18.04 webcam 설치 및 사용하기 (2) | 2023.01.16 |


댓글